Transfer AVAX Between the X-Chain and C-Chain
Introduction
AVAX tokens exist on the X-Chain, where they can be traded, on the P-Chain, where they can be provided as a stake when validating the Primary Network, and on the C-Chain, where they can be used in smart contracts or to pay for gas. In this tutorial, we’ll send AVAX tokens between the X-Chain and C-Chain.
Requirements
You've completed Run an Avalanche Node and are familiar with Avalanche's architecture.
In order to send AVAX, you need to have some AVAX! You can get real AVAX by buying it on an exchange, or you can get testnet AVAX from the AVAX Test Faucet, which is a free and easy way to get to play around with Avalanche.
Transferring AVAX using the web wallet
The easiest way to transfer AVAX between chains is to use the Avalanche Wallet which is a non-custodial and secure way to access and move AVAX.
The Avalanche Wallet source code can be found here.
Step 1 - Open the Avalanche Wallet

Select Access Wallet to enter your wallet. To connect the wallet to a network other than the main Avalanche network, select Mainnet and choose the network to connect to.
Step 2 - Log In to Your Wallet
You can access your wallet using the private key, mnemonic key phrase, keystore file or Ledger Nano S. C-Chain transfers via Ledger are not supported yet.
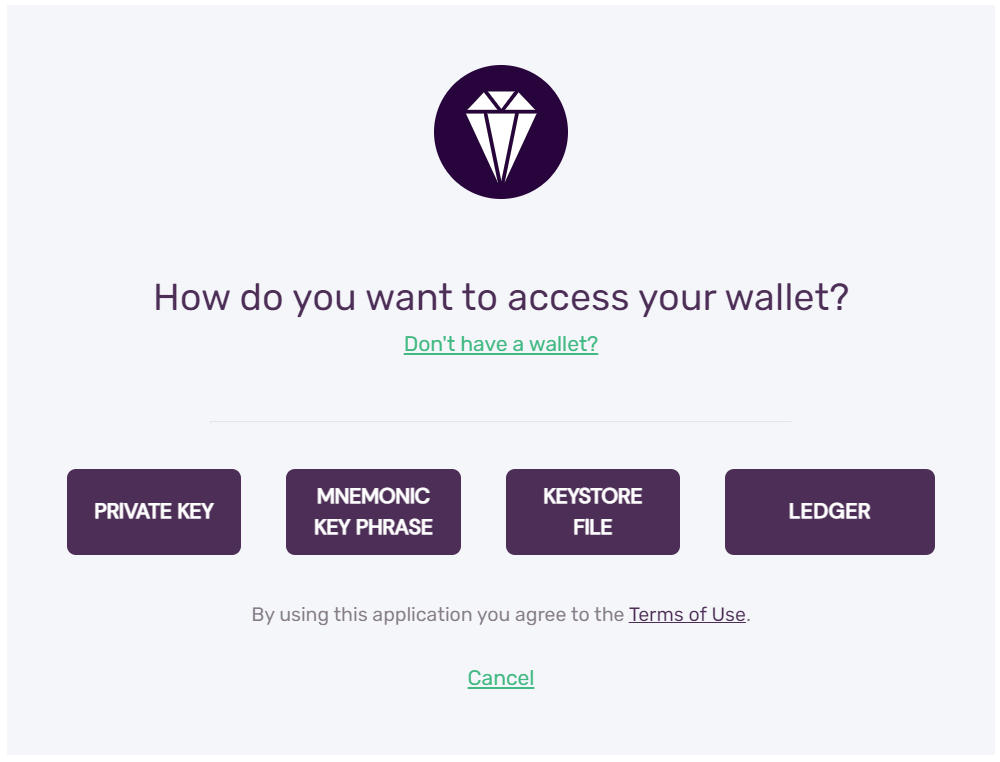
After a successful login you will see your balance, assets portfolio and various other information.
Step 3 - Go to the Cross Chain Tab
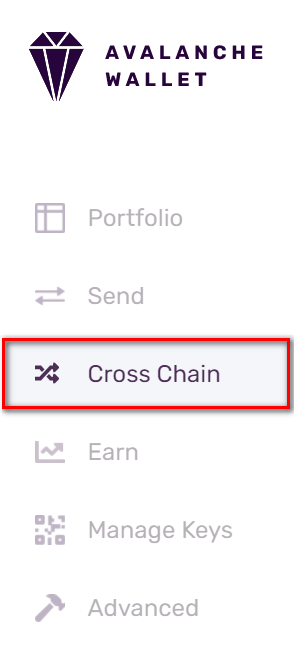
Functionality for transferring tokens between chains is on the Cross Chain tab.
Step 4 - Enter Amount to Transfer
You will be presented with a choice for Source Chain and Destination Chain. Select X-Chain and C-Chain, respectively. You will see your X and C balances, and an input field for entering the amount to transfer from source to destination chain.
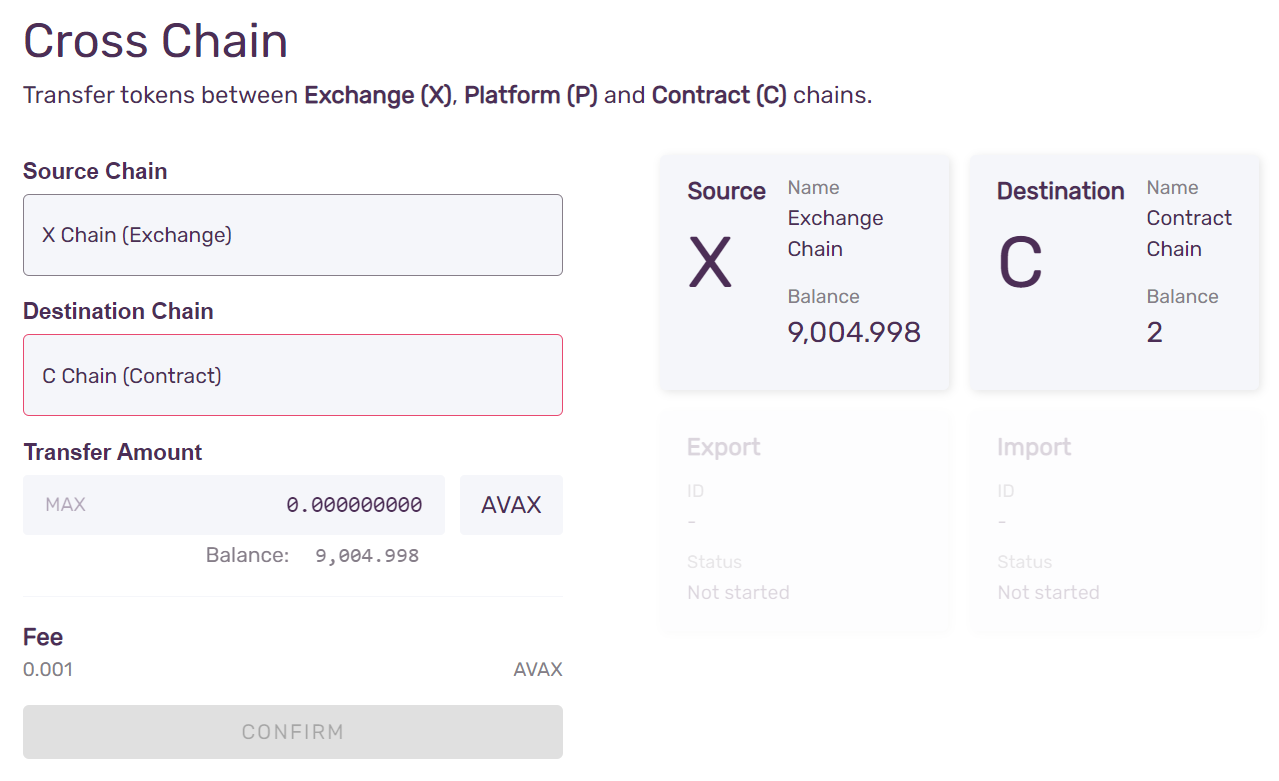
Enter the amount you wish to transfer from the X-Chain to the C-Chain.
Step 5 - Confirm the Transaction
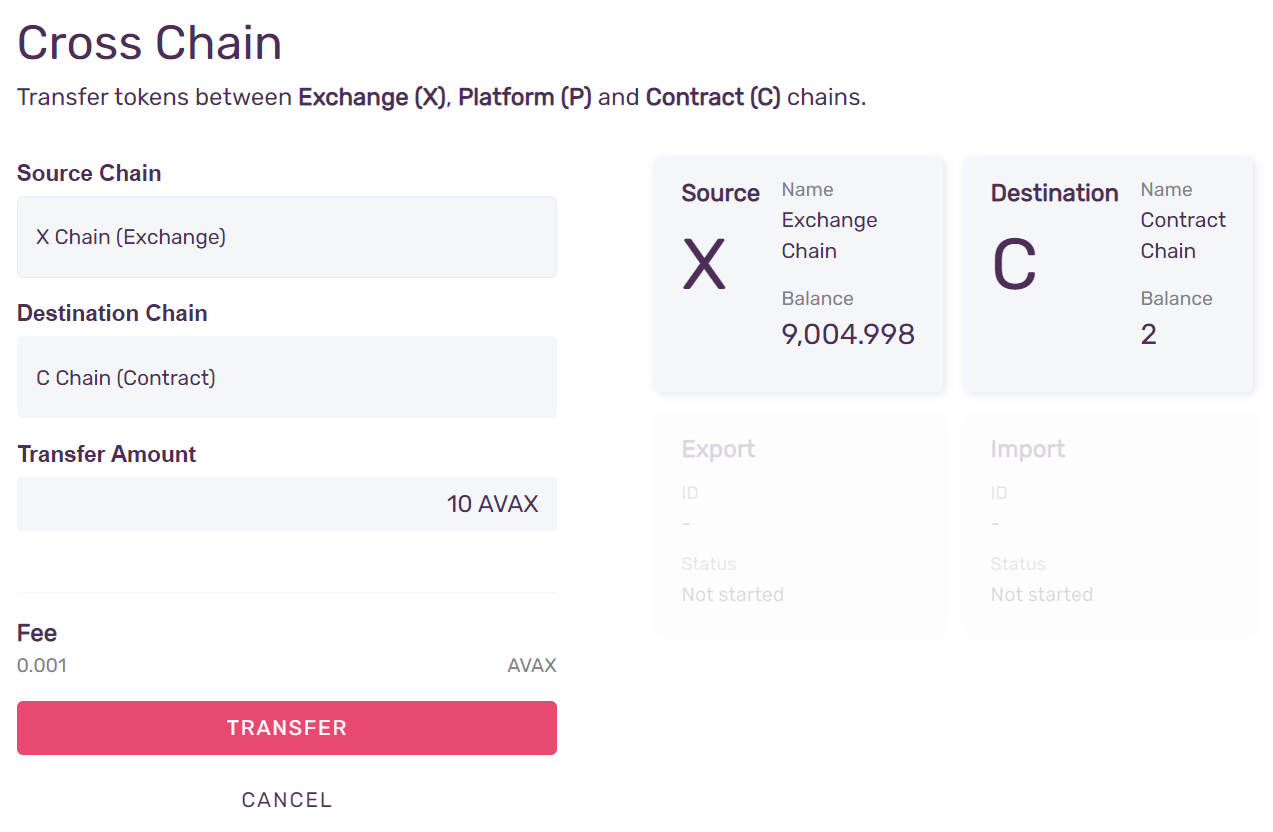
Press Confirm, and then Transfer to initiate the transfer.
Step 6 - Done!
A cross-chain transfer is a two step process: first a transaction to export the funds from the X-Chain, and another to import it to the C-Chain. The wallet will do both and show its the progress while doing so.
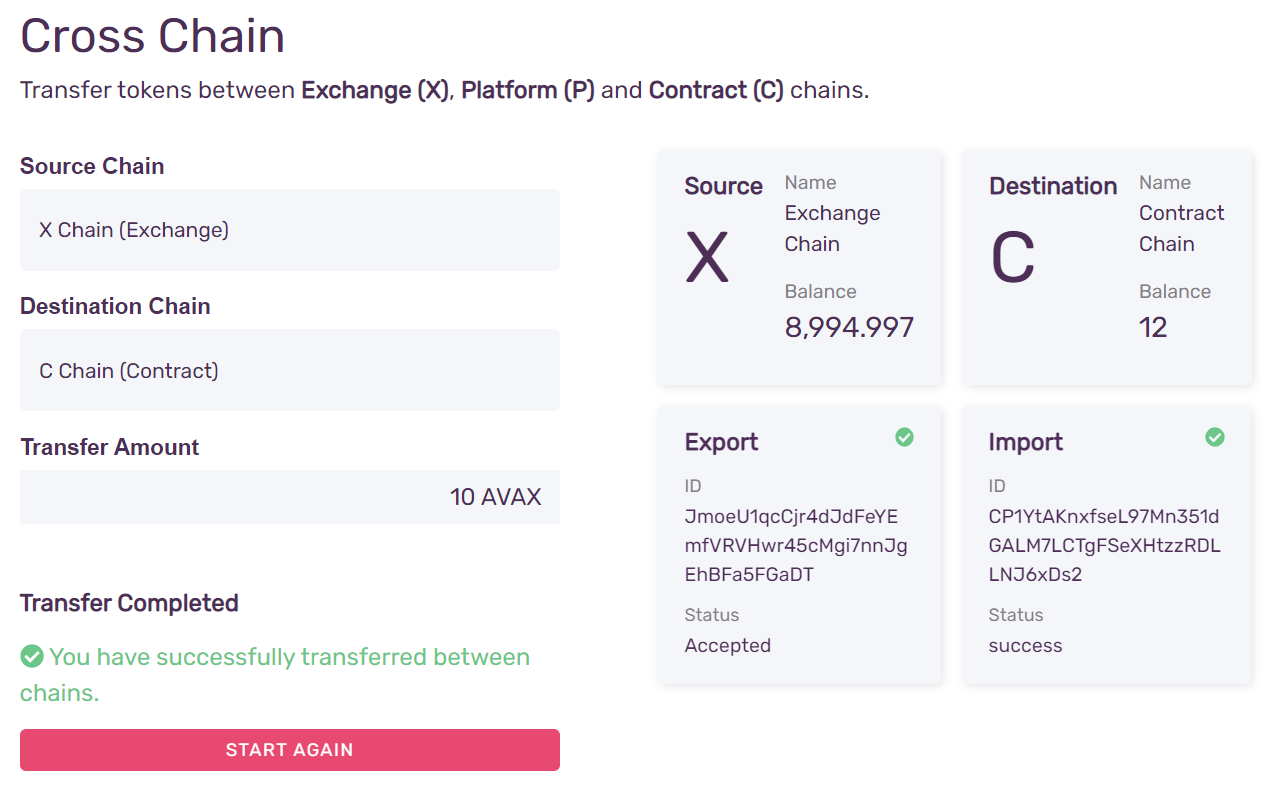
That's it! You've transferred AVAX from the X-Chain to C-Chain! Now you can use them to deploy smart contracts on C-Chain.
Transfer from the C-Chain to X-chain
To return the AVAX back to the X-Chain, you need to do the transfer in the opposite direction.
Swap source and destination chain, by selecting them from the Source and Destination dropdown menu. The rest of the process is the same: enter the amount, confirm and transfer.
Transferring from the X-Chain to C-Chain with API Calls
If you're building an application on the Avalanche network, you may want to do the transfer programmatically as part of some broader functionality. You can do that by calling the appropriate APIs on an AvalancheGo node. The rest of the tutorial assumes you have access to an AvalancheGo node, AVAX tokens on the X-Chain, and user credentials created and stored in the node's keystore.
All the example API calls below assume the node is running locally (that is, listening on 127.0.0.1). The node can be connected to the main network, a test network or a local network. In each case, the API calls and responses should be the same, except for the address formats. The node need not be local; you can make calls to a node hosted elsewhere.
As you may have noticed while transferring AVAX using the Avalanche Wallet, a cross-chain transfer is a two transaction operation:
- Export AVAX from the X-Chain
- Import AVAX to the C-Chain
Before we can do the transfer, we need to set up the address on the C-Chain, along with the controlling key.
Set Up Address and Key on the C-Chain
The X-Chain uses Bech32 addresses and the C-Chain uses hex Ethereum Virtual Machine (EVM) addresses. There is no way to convert the address from one format to the other since they are both derived from a private key using a one-way cryptographic function.
In order to get around this, you can export a private key from the X-Chain and then import it to the C-Chain. This way, you can use the X-Chain address and change the X- prefix to a C- prefix in order to get the correct Bech32 address to use for the C-Chain.
First, export a private key from the X-Chain:
curl -X POST --data '{
    "jsonrpc":"2.0",
    "id"     :1,
    "method" :"avm.exportKey",
    "params" :{
        "username" :"myUsername",
        "password":"myPassword",
        "address": "X-avax1jggdngzc9l87rgurmfu0z0n0v4mxlqta0h3k6e"
    }
}' -H 'content-type:application/json;' 127.0.0.1:9650/ext/bc/X
Response:
{
    "jsonrpc":"2.0",
    "id"     :1,
    "result" :{
        "privateKey":"PrivateKey-2w4XiXxPfQK4TypYqnohRL8DRNTz9cGiGmwQ1zmgEqD9c9KWLq"
    }
}
Now, import the same private key to the C-Chain:
curl -X POST --data '{
    "jsonrpc":"2.0",
    "id"     :1,
    "method" :"avax.importKey",
    "params" :{
        "username" :"myUsername",
        "password":"myPassword",
        "privateKey":"PrivateKey-2w4XiXxPfQK4TypYqnohRL8DRNTz9cGiGmwQ1zmgEqD9c9KWLq"
    }
}' -H 'content-type:application/json;' 127.0.0.1:9650/ext/bc/C/avax
The response contains a hex-encoded EVM address:
{
    "jsonrpc": "2.0",
    "result": {
        "address": "0x5Bf544EF123FE41B262295dBA41c5a9CFA8efDB4"
    },
    "id": 1
}
Now we have everything we need to transfer the tokens.
Transfer from the X-Chain to C-Chain
Use the address corresponding to the private key you exported and switch to using the C- prefix in the avm.export call:
curl -X POST --data '{
    "jsonrpc":"2.0",
    "id"     :1,
    "method" :"avm.export",
    "params" :{
        "assetID": "AVAX",
        "to": "C-avax1wkmfja9ve3lt3n9ye4qp3l3gj9k2mz7ep45j7q"
        "amount": 5000000,
        "username":"myUsername",
        "password":"myPassword"
    }
}' -H 'content-type:application/json;' 127.0.0.1:9650/ext/bc/X
Since your keystore user owns the corresponding private key on the C-Chain, you can now import the AVAX to the address of your choice. It’s not necessary to import it to the same address that it was exported to; you can import the AVAX to an address that you own in MetaMask or another third-party service.
curl -X POST --data '{
    "jsonrpc":"2.0",
    "id"     :1,
    "method" :"avax.import",
    "params" :{
        "to":"0x4b879aff6b3d24352Ac1985c1F45BA4c3493A398",
        "sourceChain":"X",
        "username":"myUsername",
        "password":"myPassword"
    }
}' -H 'content-type:application/json;' 127.0.0.1:9650/ext/bc/C/avax
where to is a hex-encoded EVM address of your choice.
The response looks like this:
{
    "jsonrpc": "2.0",
    "result": {
        "txID": "LWTRsiKnEUJC58y8ezAk6hhzmSMUCtemLvm3LZFw8fxDQpns3"
    },
    "id": 1
}
Note: there is no transaction fee for import transactions to the C Chain.
Once your AVAX has been transferred to the C-Chain, you can use it to deploy and interact with smart contracts.
Transfer from the C-Chain to X-Chain
Now, you can move AVAX back from the C-Chain to the X-Chain. First we need to export:
curl -X POST --data '{
    "jsonrpc":"2.0",
    "id"     :1,
    "method" :"avax.exportAVAX",
    "params" :{
        "to":"X-avax1wkmfja9ve3lt3n9ye4qp3l3gj9k2mz7ep45j7q",
        "assetID": "AVAX",
        "amount": 5000000,
        "username":"myUsername",
        "password":"myPassword"
    }
}' -H 'content-type:application/json;' 127.0.0.1:9650/ext/bc/C/avax
where to is the bech32 encoded address of an X-Chain address you hold. Make sure that the amount you export exceeds the transaction fee because both the export and import transactions will charge a transaction fee.
The response should look like this:
{
    "jsonrpc": "2.0",
    "result": {
        "txID": "2ZDt3BNwzA8vm4CMP42pWD242VZy7TSWYUXEuBifkDh4BxbCvj"
    },
    "id": 1
}
To finish the transfer, call avm.import.
curl -X POST --data '{
    "jsonrpc":"2.0",
    "id"     :1,
    "method": "avm.import",
    "params": {
        "username":"myUsername",
        "password":"myPassword",
        "sourceChain": "C",
        "to":"X-avax1wkmfja9ve3lt3n9ye4qp3l3gj9k2mz7ep45j7q"
    }
}' -H 'content-type:application/json;' 127.0.0.1:9650/ext/bc/X
where to is the bech32 encoded address the X-Chain address which you sent the funds to in the previous step.
The response should look like this:
{
    "jsonrpc": "2.0",
    "result": {
        "txID": "2kxwWpHvZPhMsJcSTmM7a3Da7sExB8pPyF7t4cr2NSwnYqNHni"
    },
    "id": 1
}
Wrapping Up
That’s it! Now, you can swap AVAX back and forth between the X-Chain and C-Chain, both by using the Avalanche Wallet, and by calling the appropriate API calls on an Avalanche node.