Fuji Workflow
Introduction
Fuji is the Avalanche network's test network. You can use it to test your dapp or smart contract after you've developed it locally. (You can use Avalanche Network Runner to test things locally.) Fuji is typically on the same version as the Avalanche Mainnet, but sometimes it is running an unreleased version of AvalancheGo. In general, you can expect Fuji's behavior to be about the same as Avalanche Mainnet. Tools such as a explorers and wallets should work with the Fuji Testnet.
In this tutorial, we’ll go through an example Fuji workflow to show how it can be used. We'll do the following:
- Set up Fuji network on Metamask (optional)
- Generate a 24 word english mnemonic via AvalancheJS
- Derive external BIP44 X-Chain addresses via AvalancheJS
- Get AVAX from the Fuji faucet
- Send AVAX via AvalancheJS
- Examine the resulting transaction on the Avalanche Explorer
- Use the mnemonic to sign into the web wallet
Set up Fuji network on Metamask (optional)
- Network Name: Avalanche FUJI C-Chain
- New RPC URL: https://api.avax-test.network/ext/bc/C/rpc
- ChainID:
43113 - Symbol:
AVAX - Explorer: https://testnet.snowtrace.io/
Generate a Mnemonic
To begin, we'll create a mnemonic phrase with AvalancheJS. Mnemonics enable us to encode strong security into a human-readable phrase. AvalancheJS supports 10 languages including English, Japanese, Spanish, Italian, French, Korean, Czech, Portugese, Chinese Simplified and Chinese Traditional.
First, generate a 24 word english BIP39-compliant mnemonic via AvalancheJS.
import { Mnemonic } from "avalanche"
const mnemonic: Mnemonic = Mnemonic.getInstance()
const strength: number = 256
const wordlist = mnemonic.getWordlists("english") as string[]
const m: string = mnemonic.generateMnemonic(strength, randomBytes, wordlist)
console.log(m)
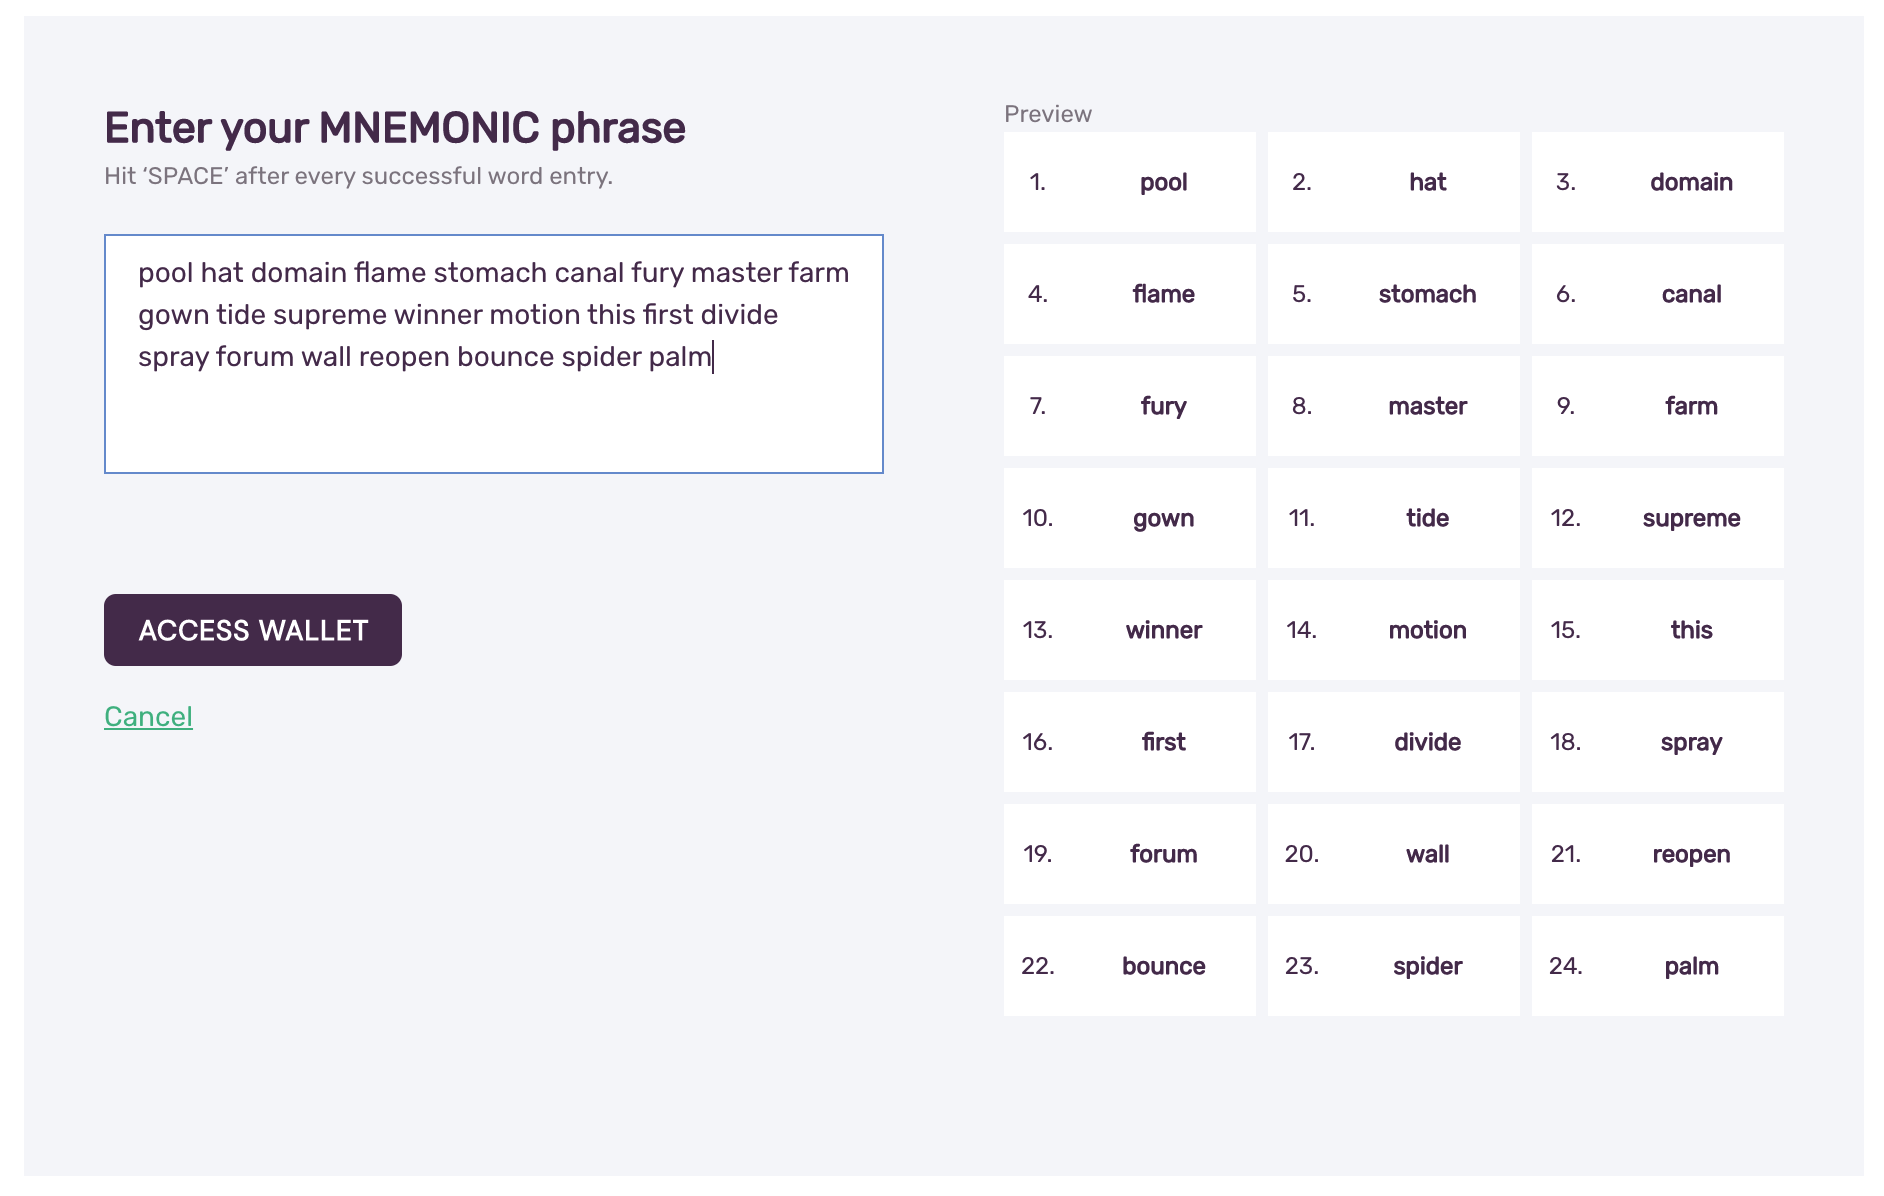
// "pool hat domain flame stomach canal fury master farm gown tide supreme winner motion this first divide spray forum wall reopen bounce spider palm"
Derive Addresses
After generating a mnemonic we can use AvalancheJS to derive BIP32-compliant hierarchical deterministic (HD) keypairs.
import HDNode from "avalanche/utils/hdnode"
const seed: Buffer = mnemonic.mnemonicToSeedSync(m)
const hdnode: HDNode = new HDNode(seed)

for (let i: number = 0; i <= 2; i++) {
  // Deriving the _i_th external BIP44 X-Chain address
  const child: HDNode = hdnode.derive(`m/44'/9000'/0'/0/${i}`)
  keychain.importKey(child.privateKeyCB58)
}

const xAddressStrings: string[] = xchain.keyChain().getAddressStrings()
console.log(xAddressStrings)
// [
//   'X-fuji1cfvdpdqyzpp8pq0g6trmjsrn9pt8nutsfm7a40',
//   'X-fuji1y75dj6qygj7frw2xtcfn724qfty4aadnmeth6y',
//   'X-fuji1p6n0vyjqgmp06f7pr405q2flqu9v93j383ncam'
// ]
Note that we're using keychain which hasn't been defined yet. Creating an empty keychain can be seen in this example AvalancheJS script. There are links to dozens of AvalancheJS examples in the resources listed below.
As long as you have the menmonic phrase, you can re-generate your private keys and the addresses they control.
Get a Drip from the Fuji Faucet
We can get a "drip" of AVAX from the Fuji faucet. Paste the address into the Fuji faucet website. These AVAX are for the Fuji Testnet and have no monetary value.
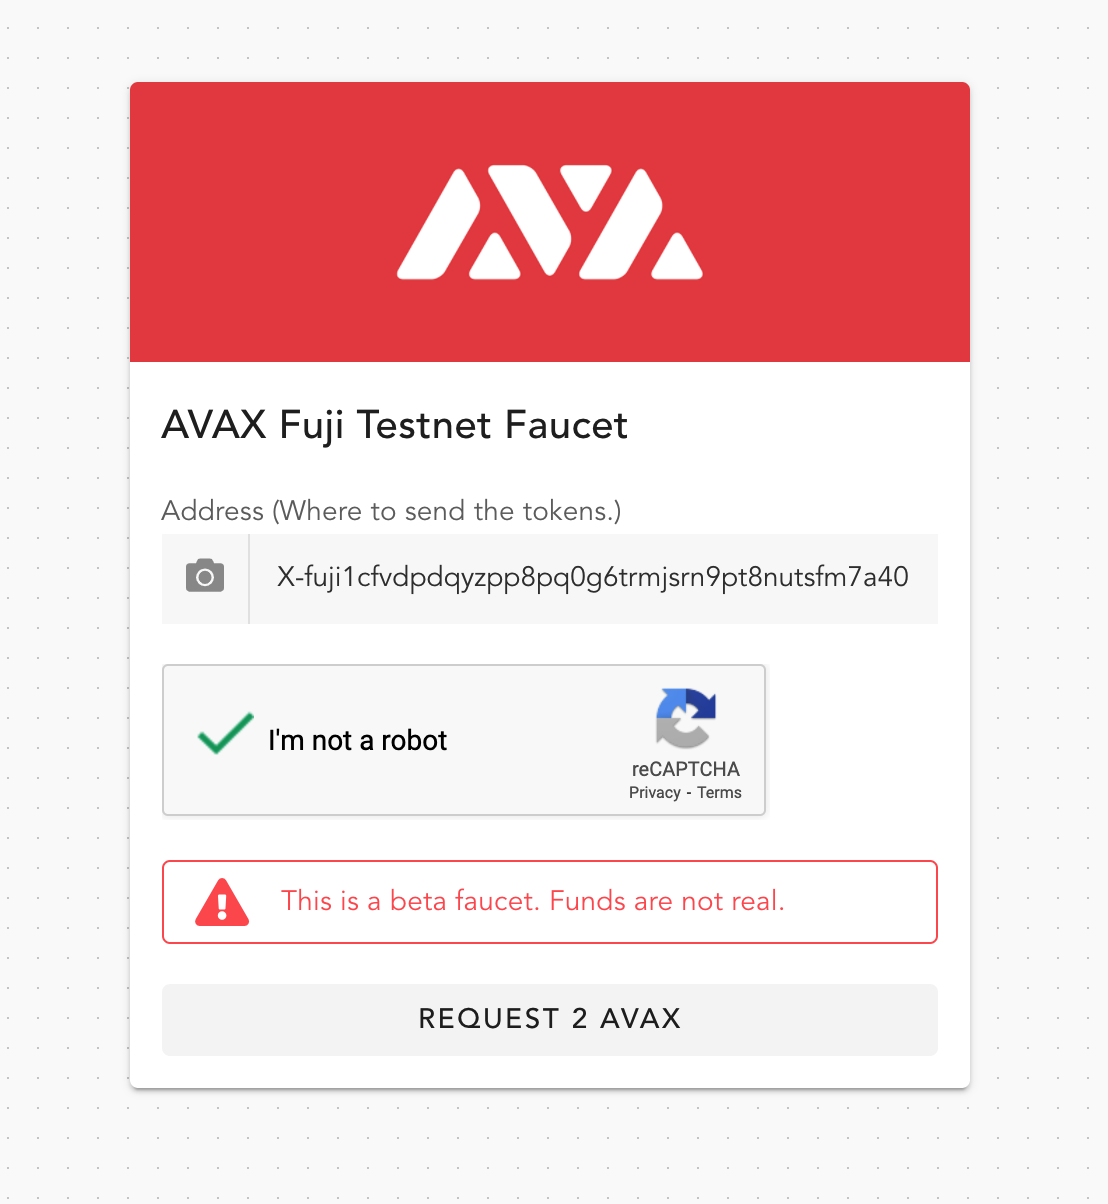
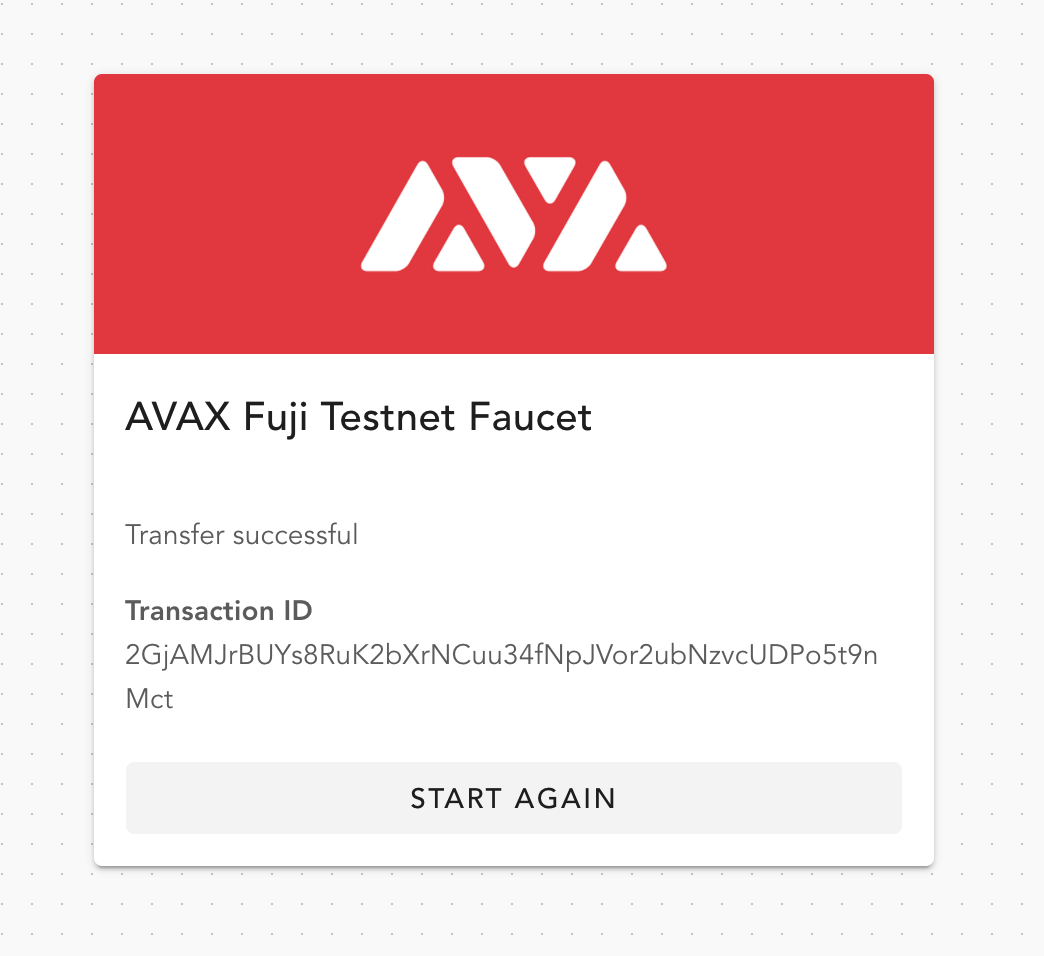
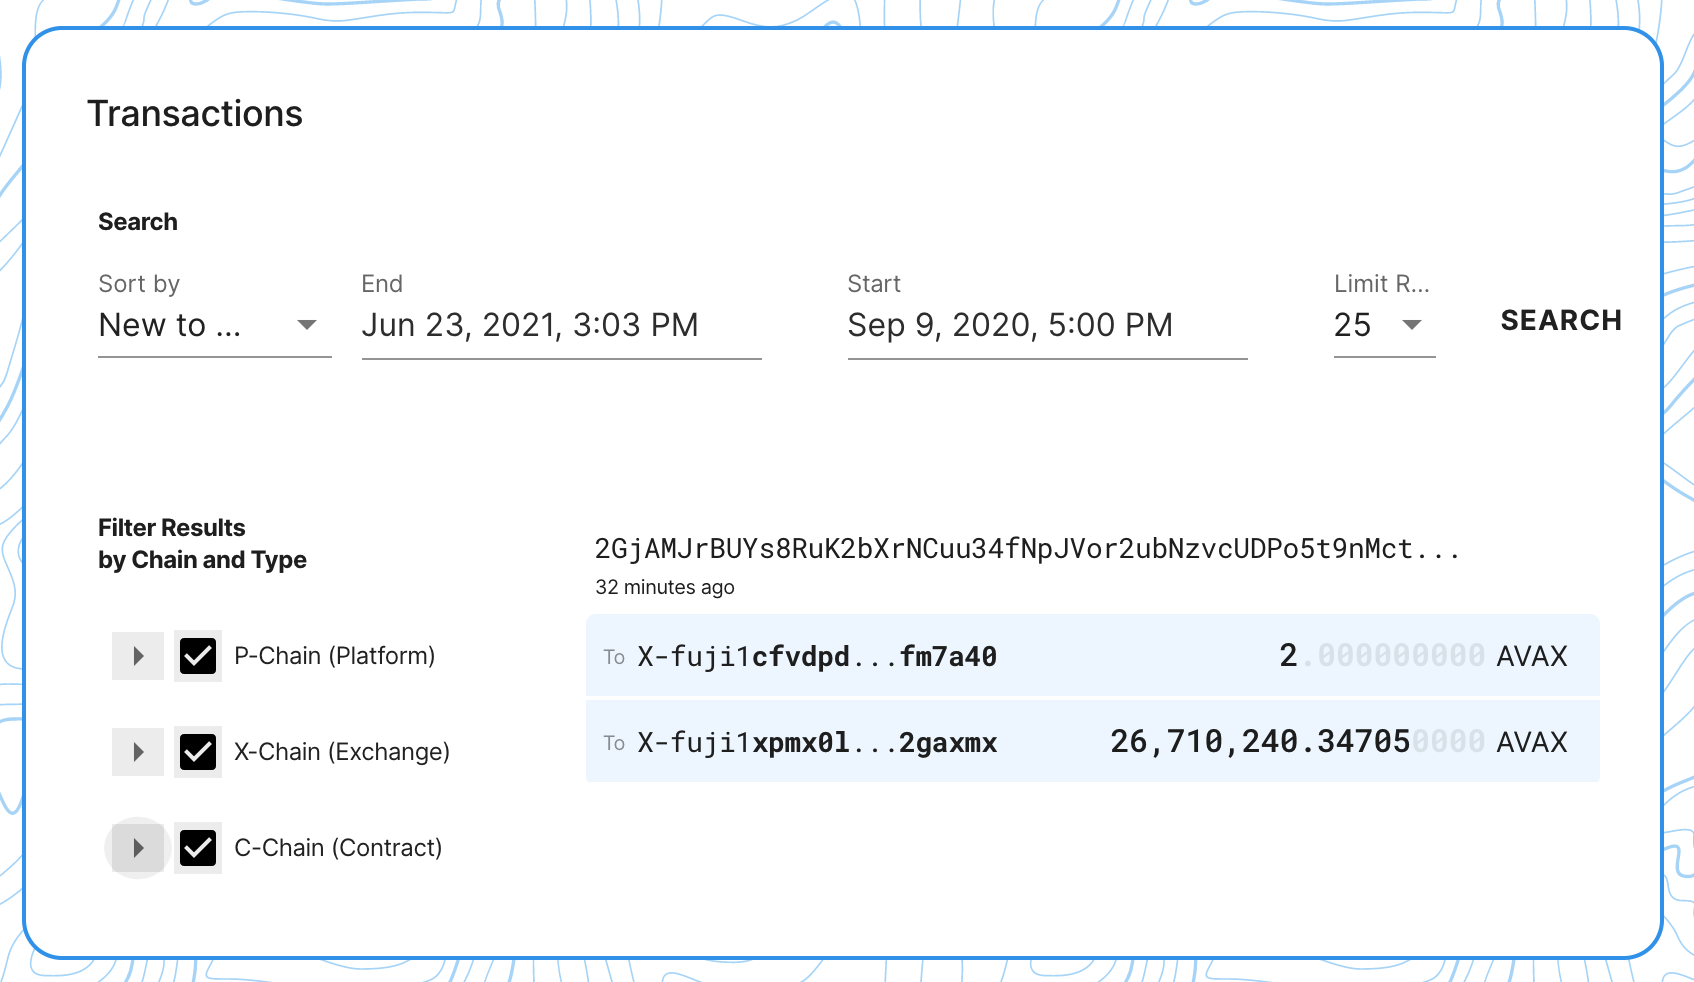
The faucet will send some AVAX to the address and return a transaction ID (txID). This txID can be used with the Fuji Testnet Explorer to learn more about the transaction.
Check the Transaction Details
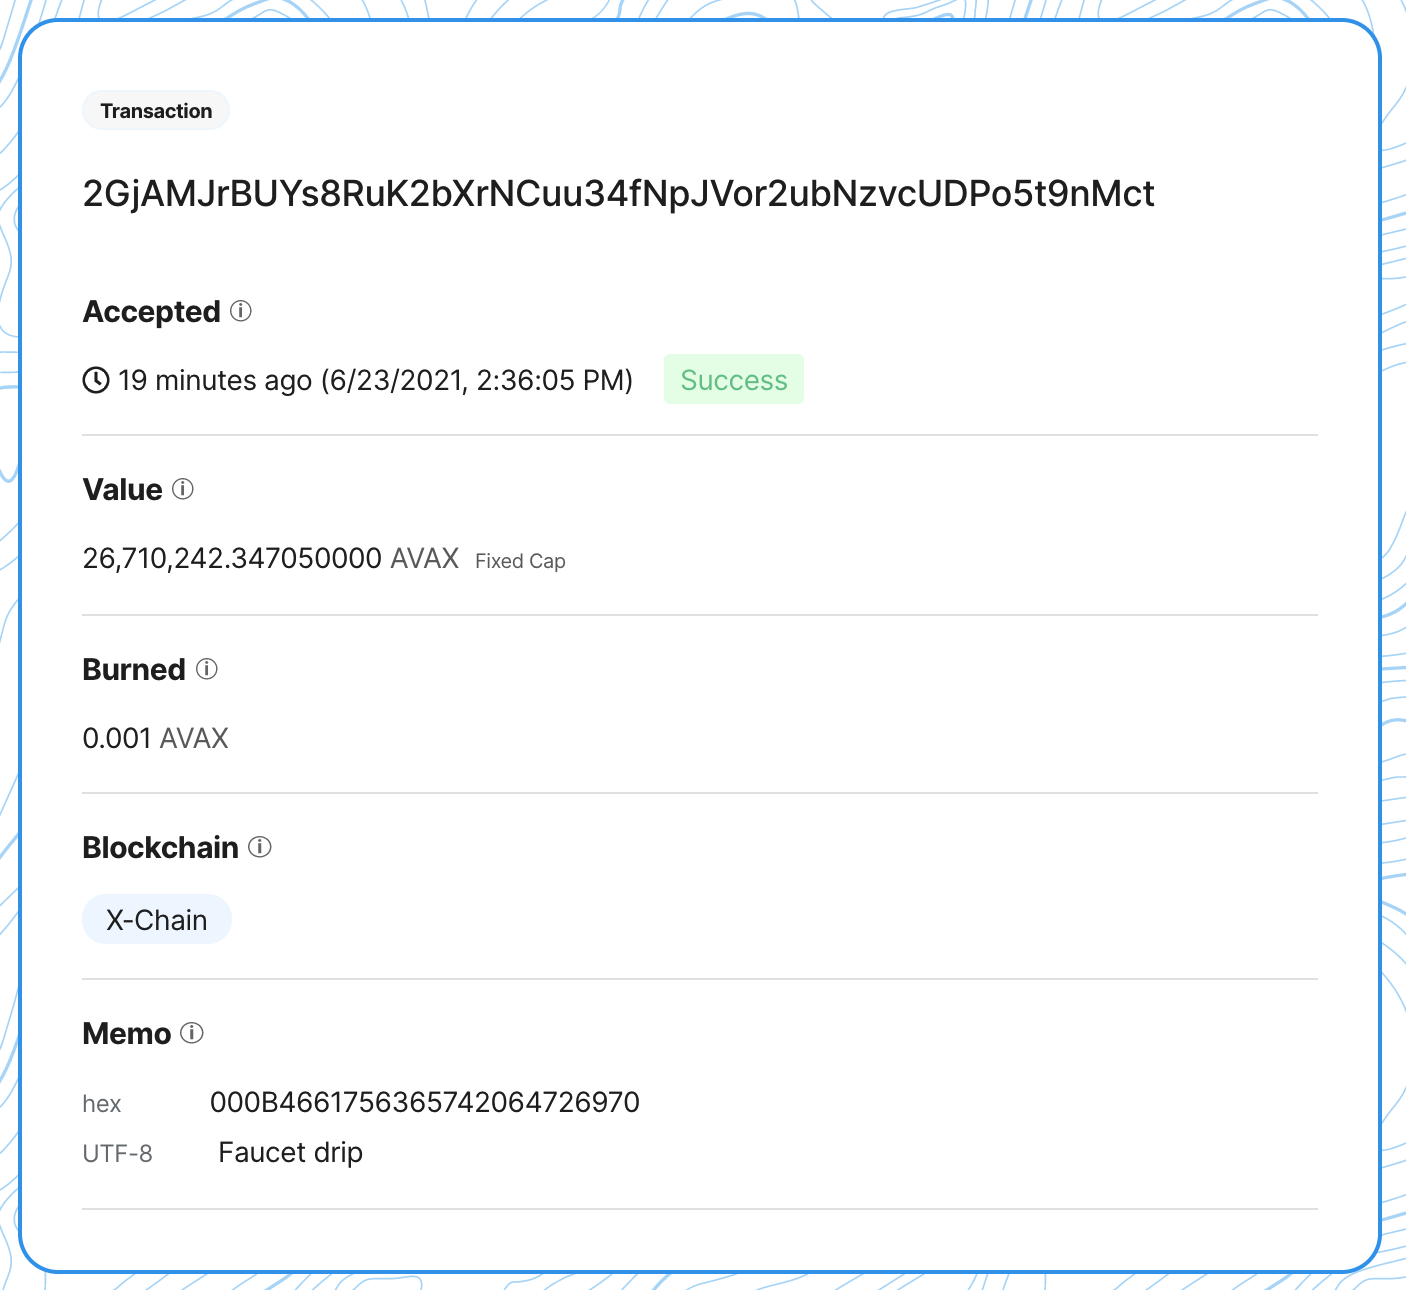
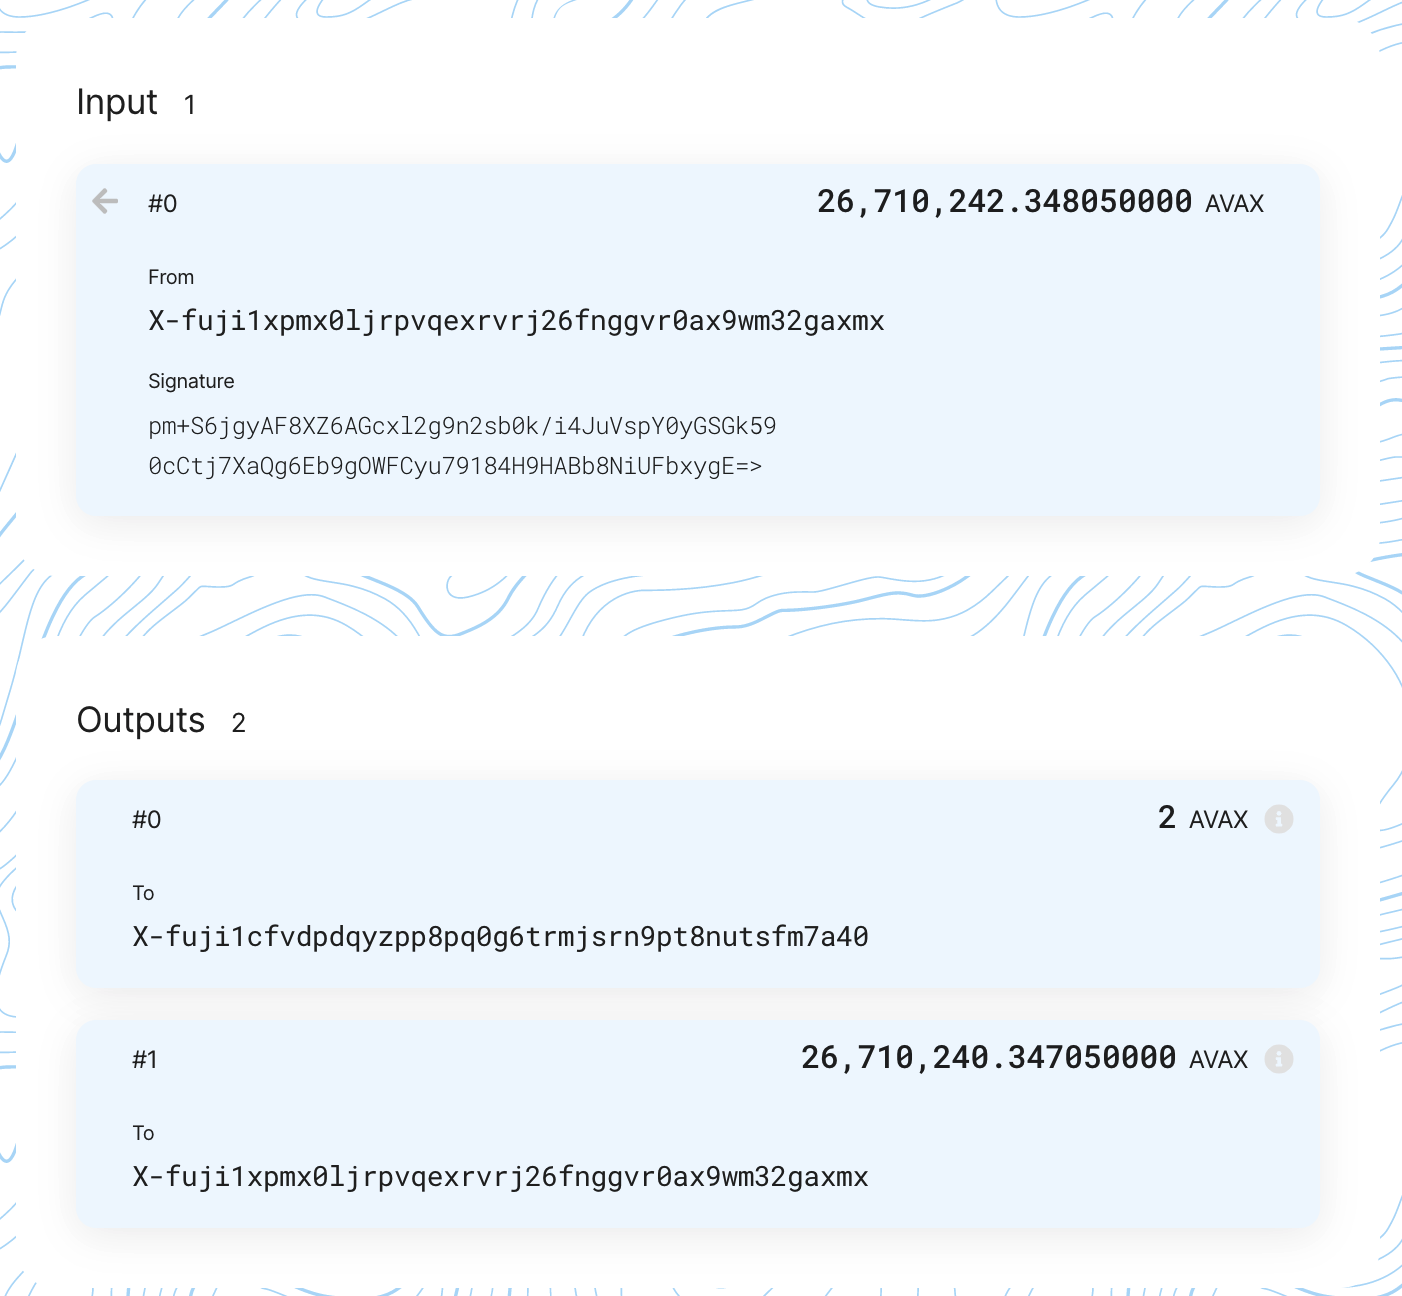
The txID, 2GjAMJrBUYs8RuK2bXrNCuu34fNpJVor2ubNzvcUDPo5t9nMct, can be seen on the Fuji Testnet Explorer. Avalanche also has a Mainnet Explorer.
Get the Balance
We can also use the Fuji Explorer to get the balance for the 1st BIP44-derived address—X-fuji1cfvdpdqyzpp8pq0g6trmjsrn9pt8nutsfm7a40.
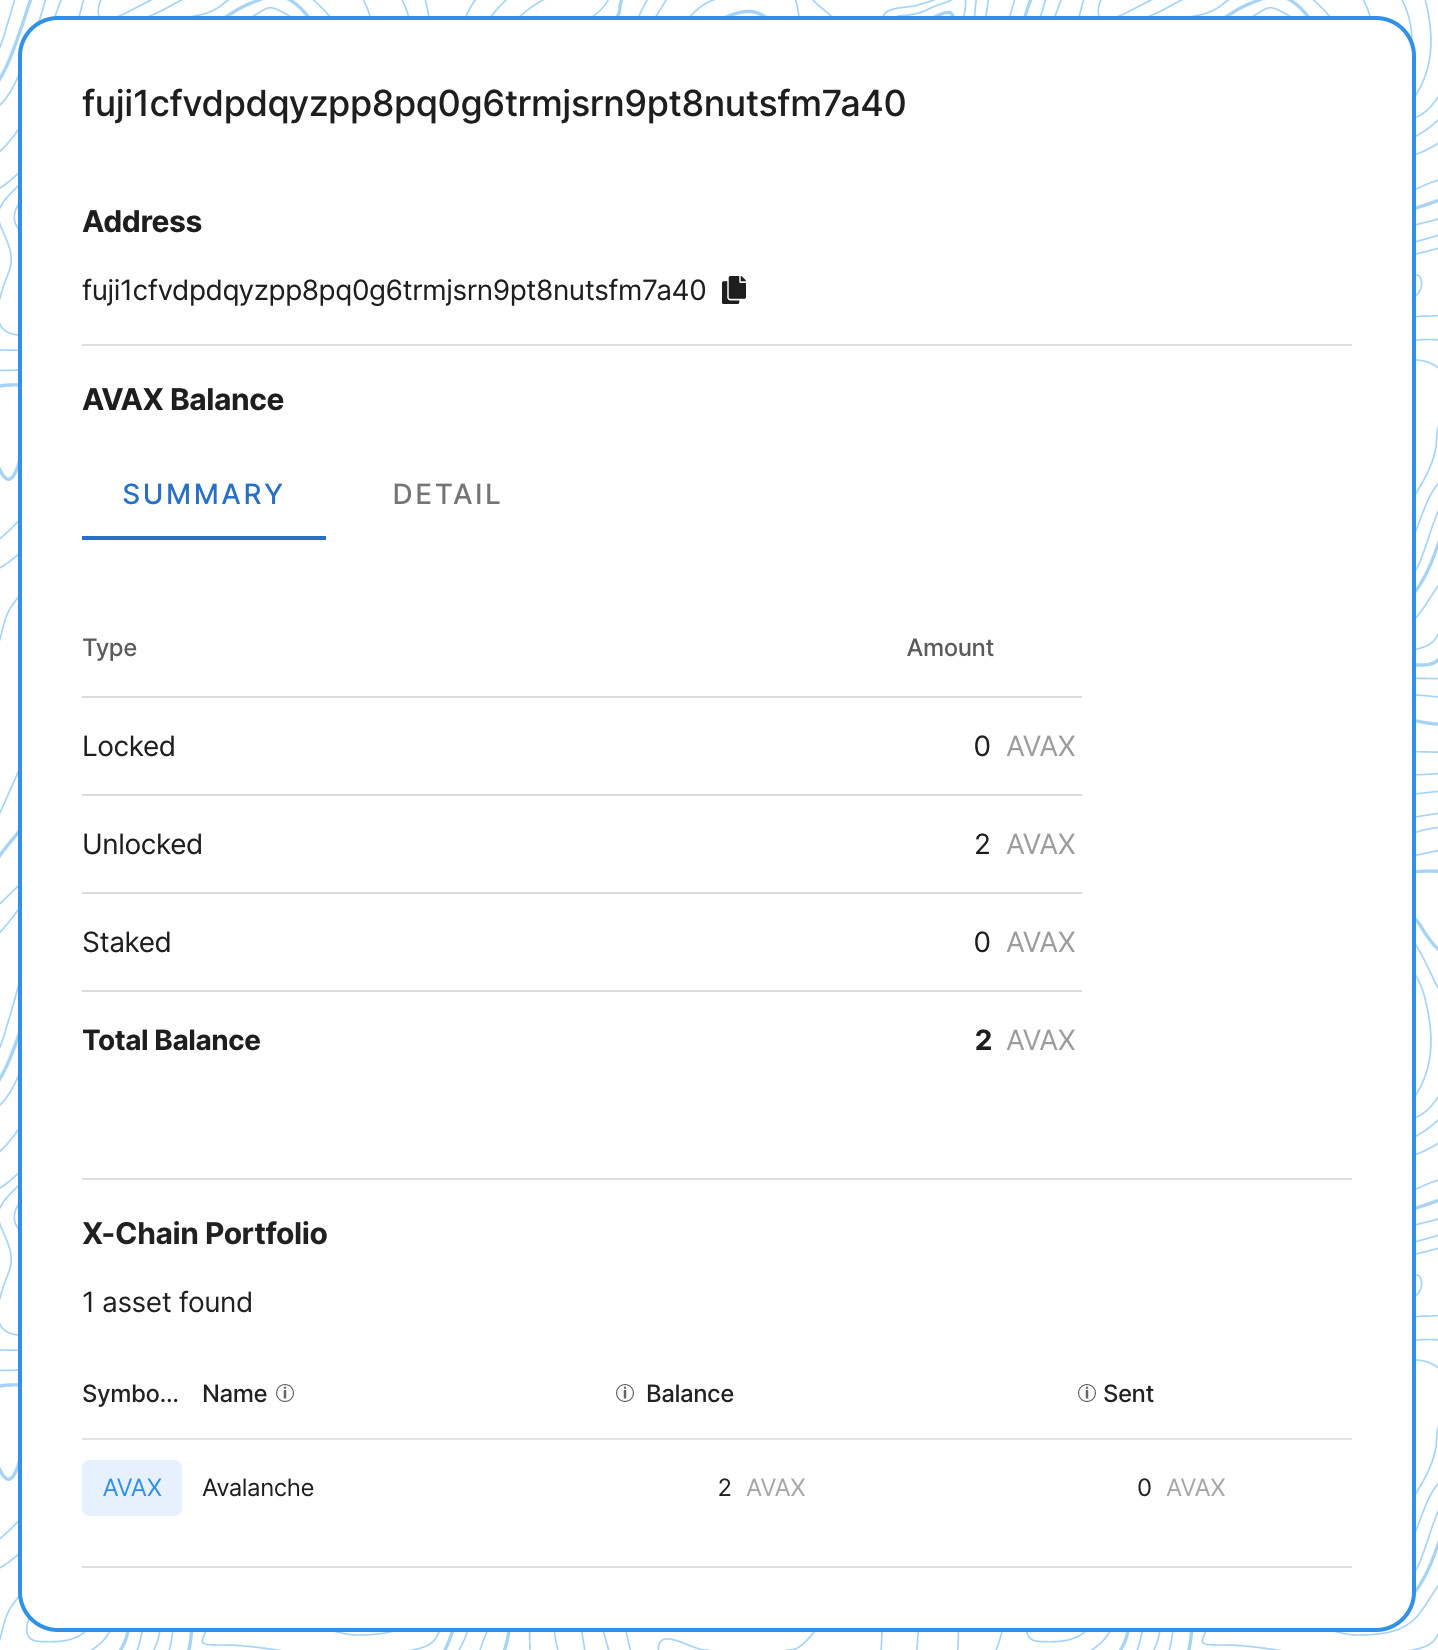
Alternatively, we can use AvalancheJS to get the balance.
const address: string = "X-fuji1cfvdpdqyzpp8pq0g6trmjsrn9pt8nutsfm7a40"
const balance: any = await xchain.getBalance(address, "AVAX")
console.log(balance)
// {
//   balance: '2000000000',
//   utxoIDs: [
//     {
//       txID: '2GjAMJrBUYs8RuK2bXrNCuu34fNpJVor2ubNzvcUDPo5t9nMct',
//       outputIndex: 0
//     }
//   ]
// }
Sending AVAX
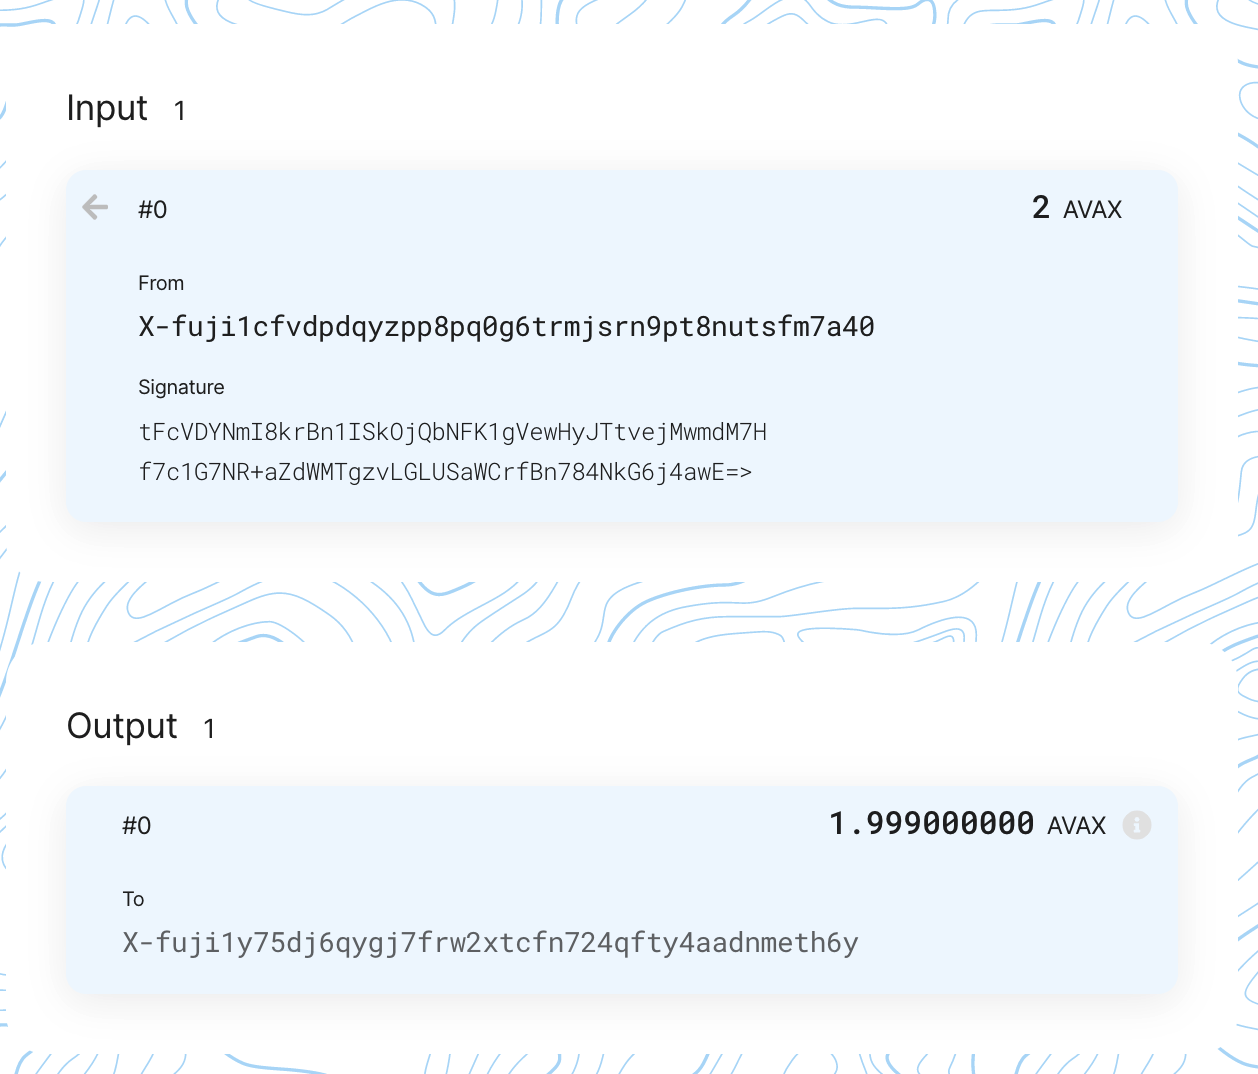
The faucet sent 2 AVAX to the first address we generated. Let's send AVAX from the 1st address to the 2nd address.
// get the AVAX asset ID
const avaxAssetID: string = Defaults.network[networkID].X['avaxAssetID']

// get the AVAX balance for the 1st address
const getBalanceResponse: any = await xchain.getBalance(xAddressStrings[0], avaxAssetID)
const balance: BN = new BN(getBalanceResponse.balance)

// subtract the fee
const fee: BN = xchain.getDefaultTxFee()
const amount: BN = balance.sub(fee)

// get the UTXOs for the 1st address
const avmUTXOResponse: any = await xchain.getUTXOs(xAddressStrings[0])
const utxoSet: UTXOSet = avmUTXOResponse.utxos

// build an UnsignedTx sending AVAX from the first external BIP44 address to the second external BIP44 address
const unsignedTx: UnsignedTx = await xchain.buildBaseTx(
  utxoSet,
  amount,
  avaxAssetID,
  [xAddressStrings[1]],
  [xAddressStrings[0]],
  [xAddressStrings[1]]
)

// sign it
const tx: Tx = unsignedTx.sign(xKeychain)

// issue it and get a txid
const txid: string = await xchain.issueTx(tx)
console.log(`Success! TXID: ${txid}`)
// Success! TXID: ankMr1tD65A9SSto5w4ic1d31t6w42jeu8pfv6v4gRPpMg17g
Verify Success
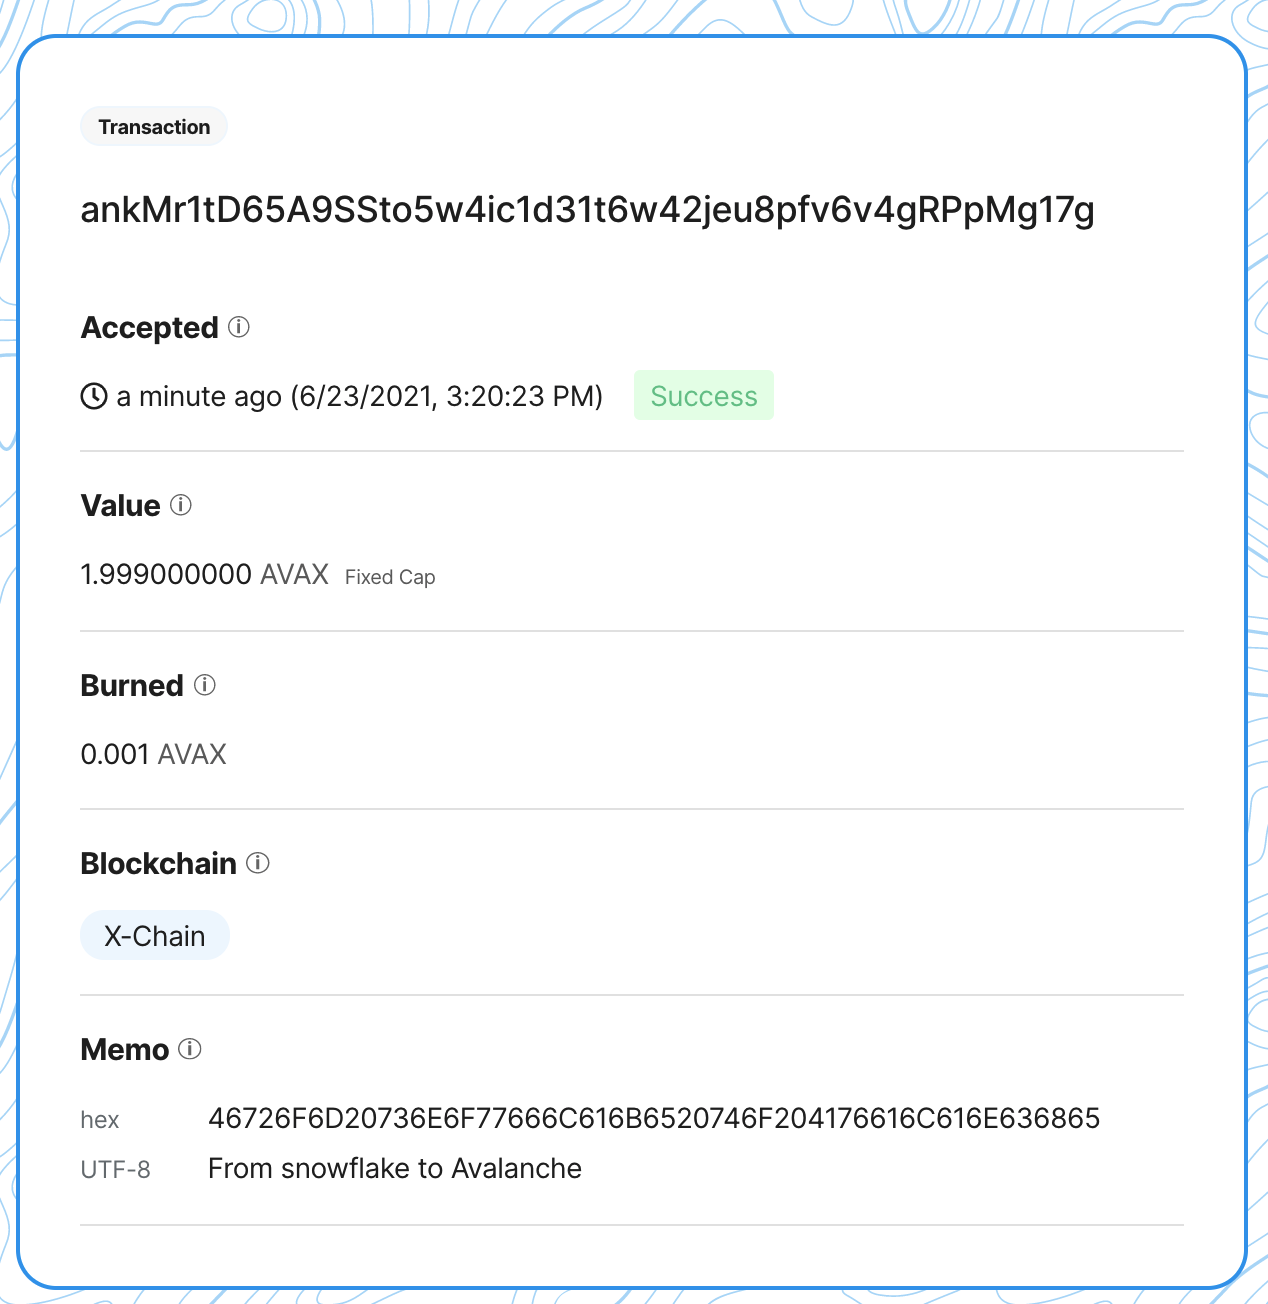
We can verify that the transaction, ankMr1tD65A9SSto5w4ic1d31t6w42jeu8pfv6v4gRPpMg17g, was successful using AvalancheJS.
const txid: string = "ankMr1tD65A9SSto5w4ic1d31t6w42jeu8pfv6v4gRPpMg17g"
const status: string = await xchain.getTxStatus(txid)
console.log(status)
// Accepted
Alternatively we can use the Fuji Tesntet Explorer. The transaction can be seen on the Fuji Explorer.
Get the Balance
We can also use the Fuji Explorer to get the balance for the 2nd address—X-fuji1y75dj6qygj7frw2xtcfn724qfty4aadnmeth6y.
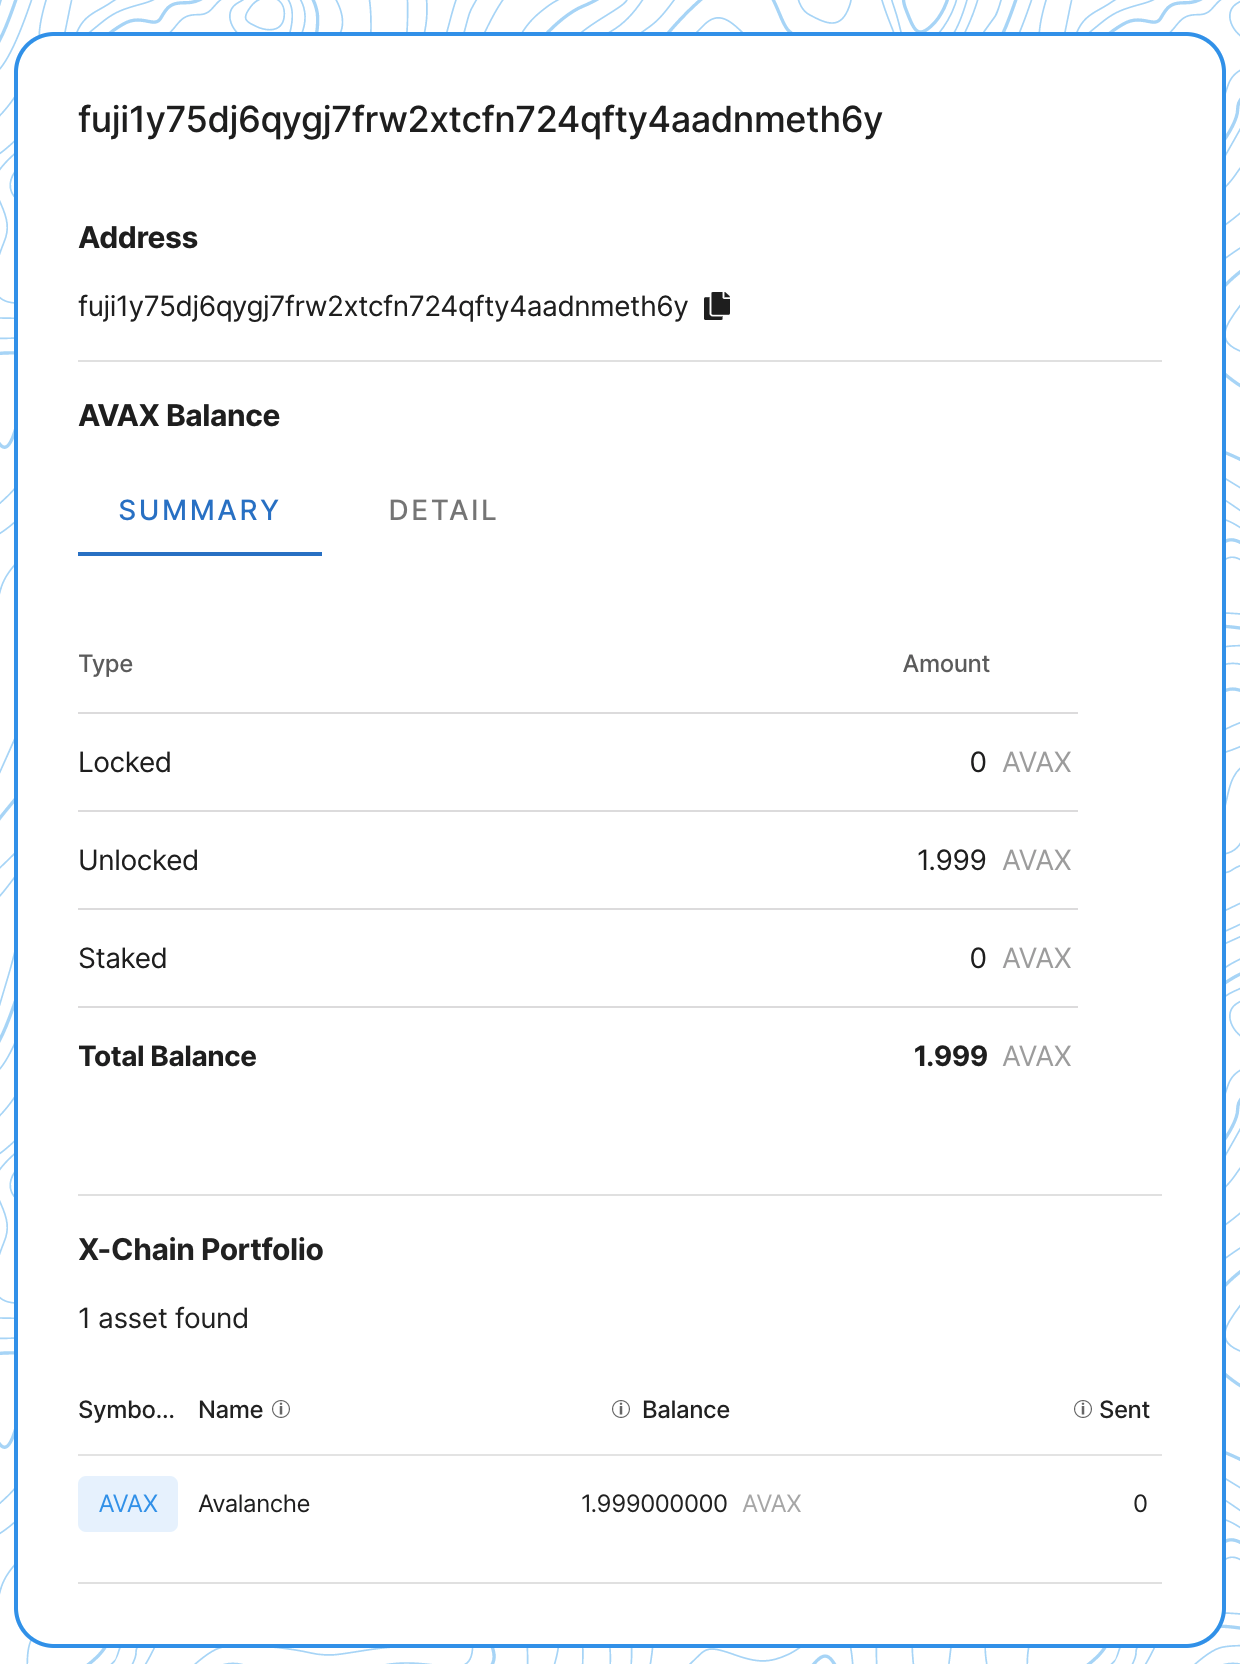
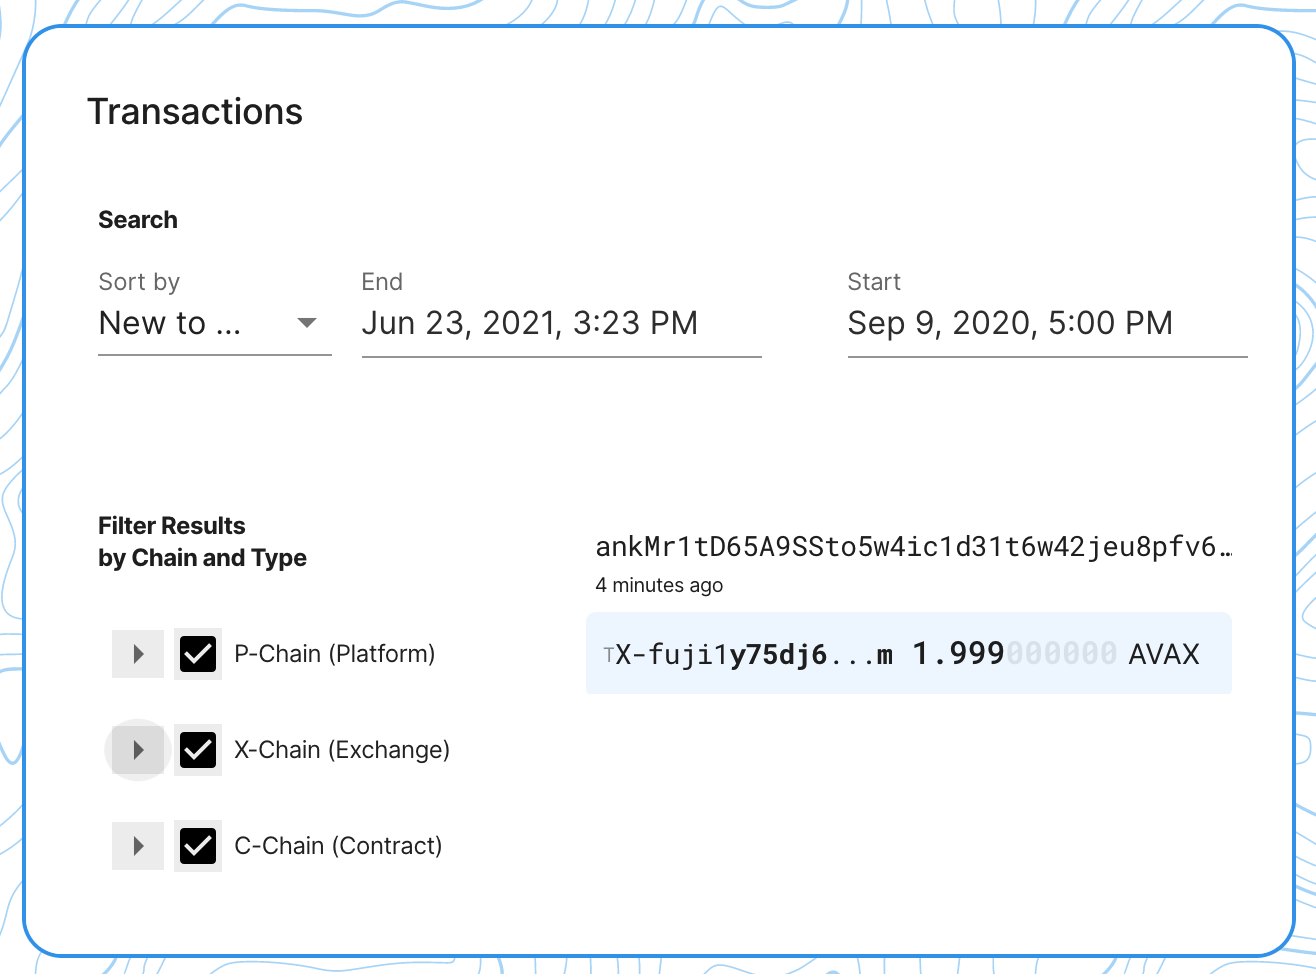
Alternatively, we can use AvalancheJS to get the balance.
const address: string = "X-fuji1y75dj6qygj7frw2xtcfn724qfty4aadnmeth6y"
const balance: any = await xchain.getBalance(address, "AVAX")
console.log(balance)
// {
//   balance: '1999000000',
//   utxoIDs: [
//     {
//       txID: 'ankMr1tD65A9SSto5w4ic1d31t6w42jeu8pfv6v4gRPpMg17g',
//       outputIndex: 0
//     }
//   ]
// }
Sign into the Web Wallet
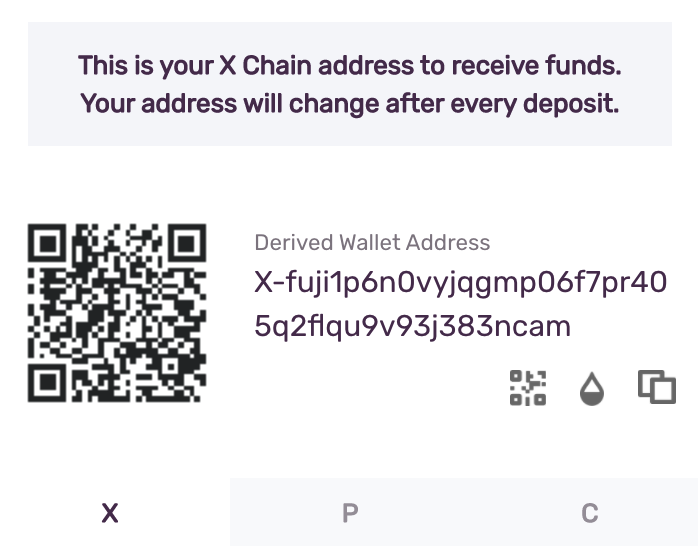
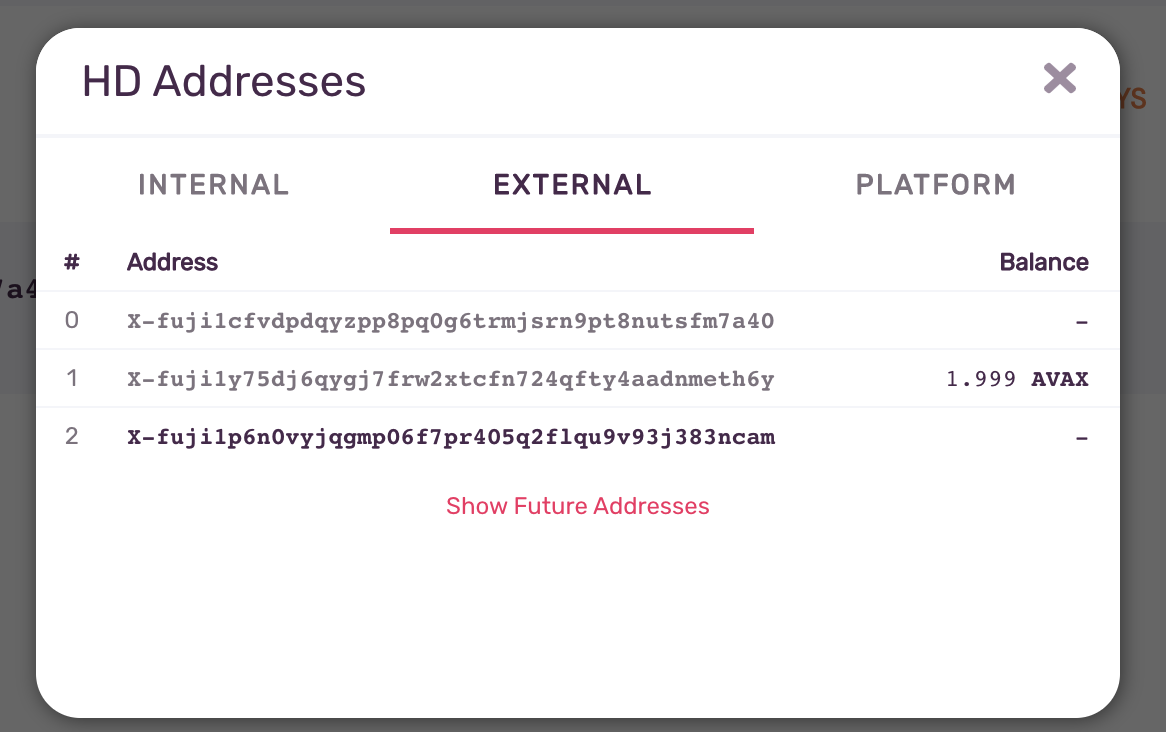
Lastly, we can use the mnemonic to access the Avalanche Web Wallet. We'll see that it has the AVAX balance and that it auto-magically derives the 3rd address from the mnemonic.
Use the mnemonic to access the Web Wallet.
The balance is correct and the "active" address is the 3rd derived address.
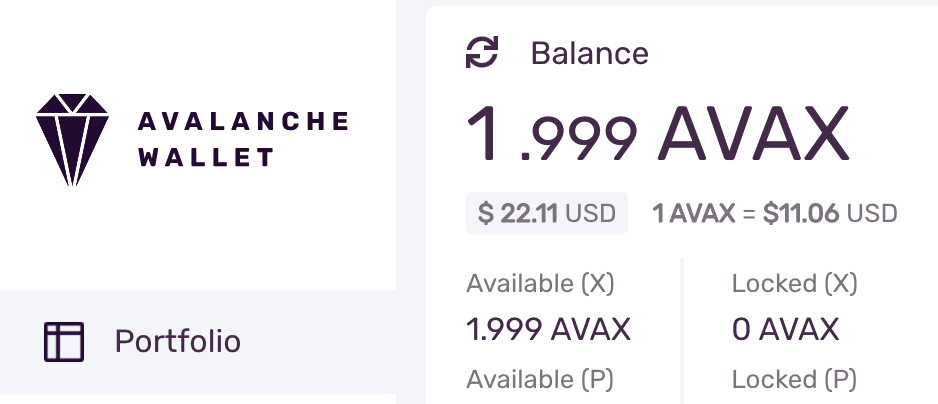
Also note that the wallet GUI shows that it derived the same 3 addresses as our script above.

Summary
The Fuji Testnet plays a critical role in testing and QAing dapps, smart contracts and financial products before deploying to the Mainnet. Tooling like AvalancheJS, the public API, faucet, and explorer helps to ensure that your testing and QA environment is close to Mainnet so that you can be confident when you launch on Mainnet.
Resources
For additional and valuable resources please see below.
Faucet
The Fuji Faucet sends AVAX to X-Chain or C-Chain addresses to help you test. (This testnet Avax has no value.)
Wallet
The Avalanche Web Wallet is a simple, secure, non-custodial wallet for storing Avalanche assets. It supports Mainnet, Fuji and custom networks.
Explorer
The Avalanche Explorer allows you to explore the network on Mainnet and Fuji.
Public API
See here.
AvalancheJS Examples
There are over 60 example AvalancheJS scripts which demonstrate how to assets and NFTs, send transactions, add validators and more.